Pumpkin Art Project Using Oil Pastels for Third Grade
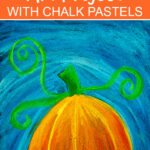
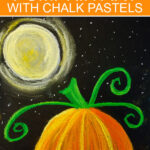
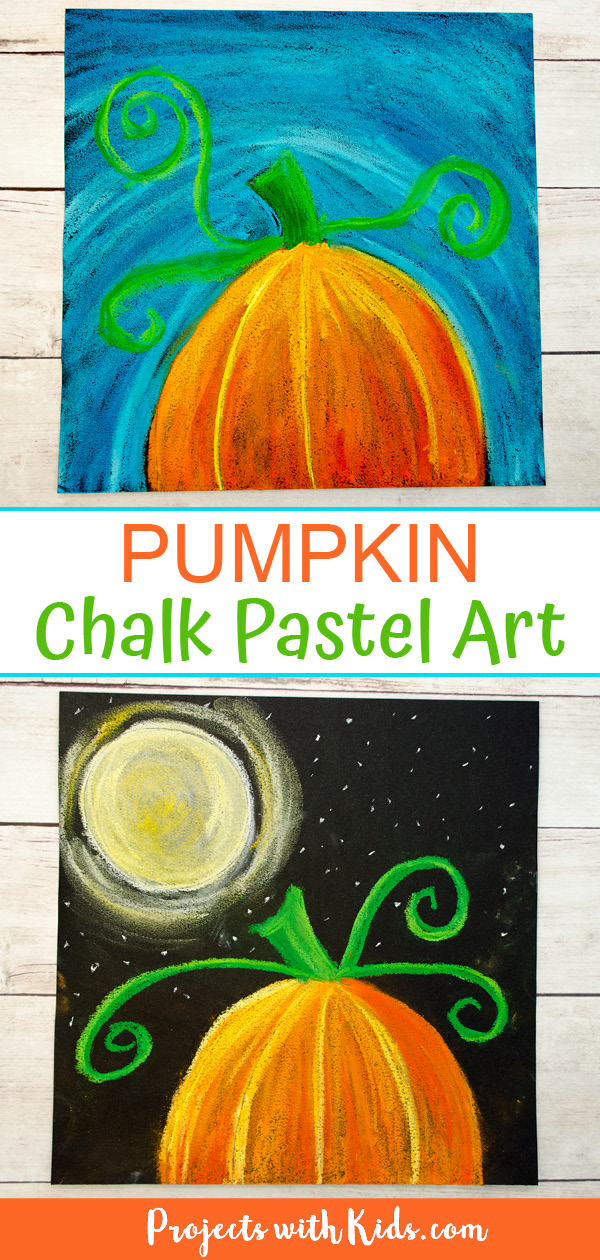
This pumpkin chalk pastel art is perfect for either a fall or Halloween projection idea! I couldn't decide which 1 I liked better, so I included both of these ideas into this tutorial. Starting time with the pumpkin so kids can customize their heaven to either a cute fall solar day or spooky Halloween dark.
Pastels are so fun for kids to explore! Take a look at my drove of chalk pastel fine art for more creative ideas kids will love.
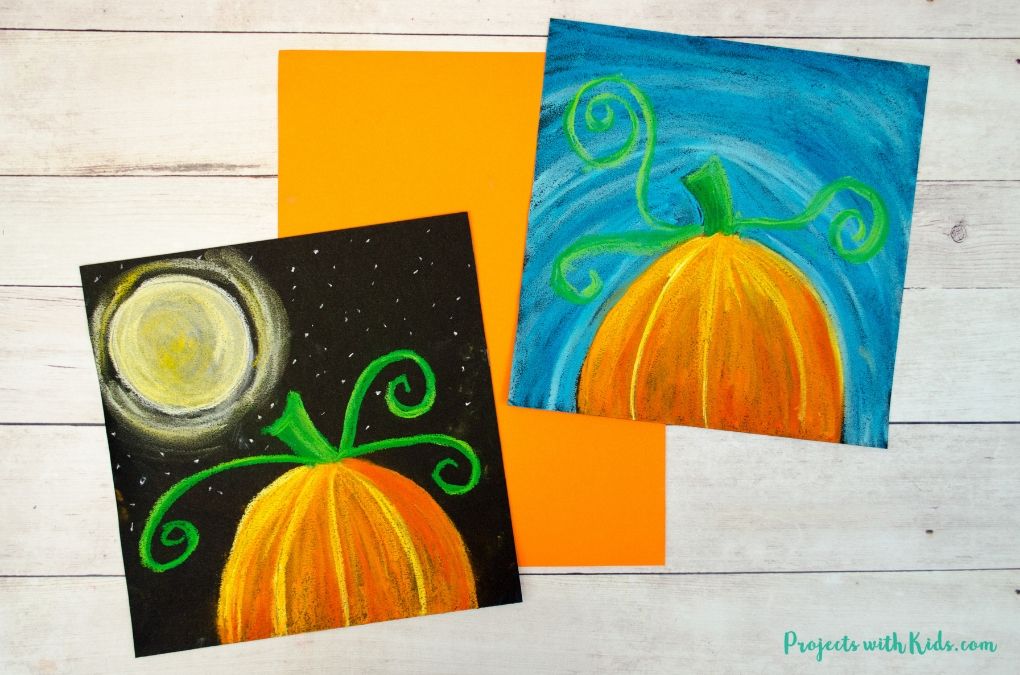
This pumpkin art is a neat project idea for older kids and tweens, requires only chalk pastels and black paper and will produce wow-worthy art! It provides a wonderful opportunity for kids to learn and practice dissimilar chalk pastel techniques.
If you are looking for more fall art projects take a look at my collection of creative autumn painting ideas for kids! In that location are ideas for kids of all ages that use different types of art materials and techniques.
Create your own pumpkin chalk pastel fine art
This post contains chapter links, which come at no toll to you. If you would like more than information delight review my privacy & disclosure policy.
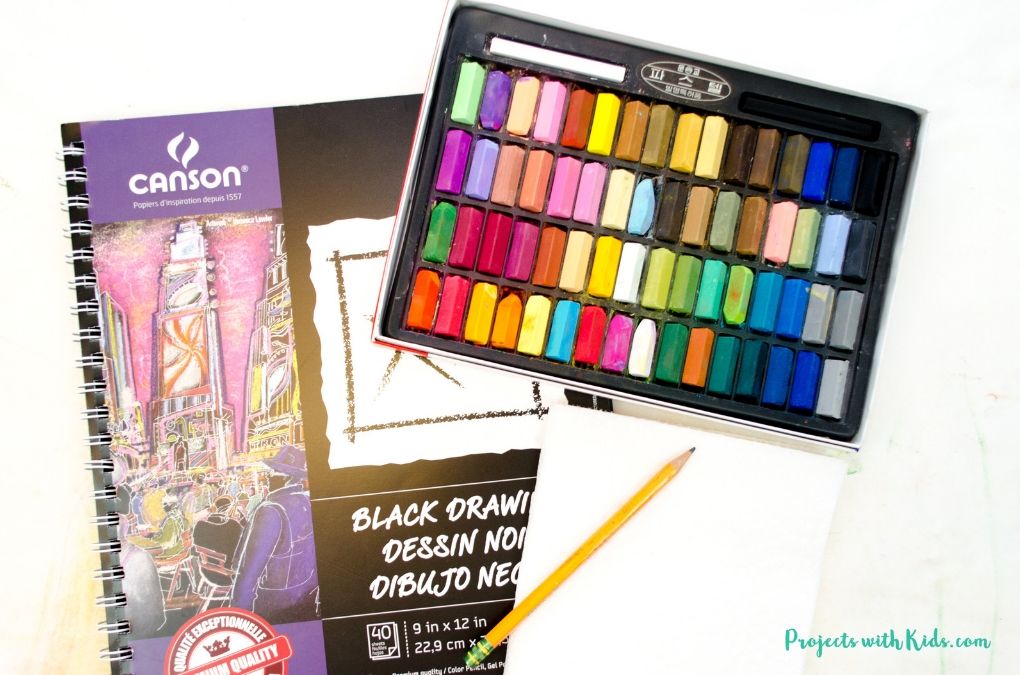
Supplies
- Black cartoon paper, pastel newspaper, scrapbook paper or construction paper
- Chalk pastels
- Pencil
- Paper towels
- Blending stick (optional)
- Workable fixative (optional)
Instructions
1.Get-go by getting your paper ready. I cut our newspaper to a 9 x 9 inch square. I find that when working with chalk pastels, it can be less intimidating for kids to work on a smaller scale.
We used black cartoon paper for this project, but yous could also use pastel paper, scrapbook paper or construction paper. Whichever paper yous choose, the pastels will look and behave slightly unlike. But will all the same plow out dandy!
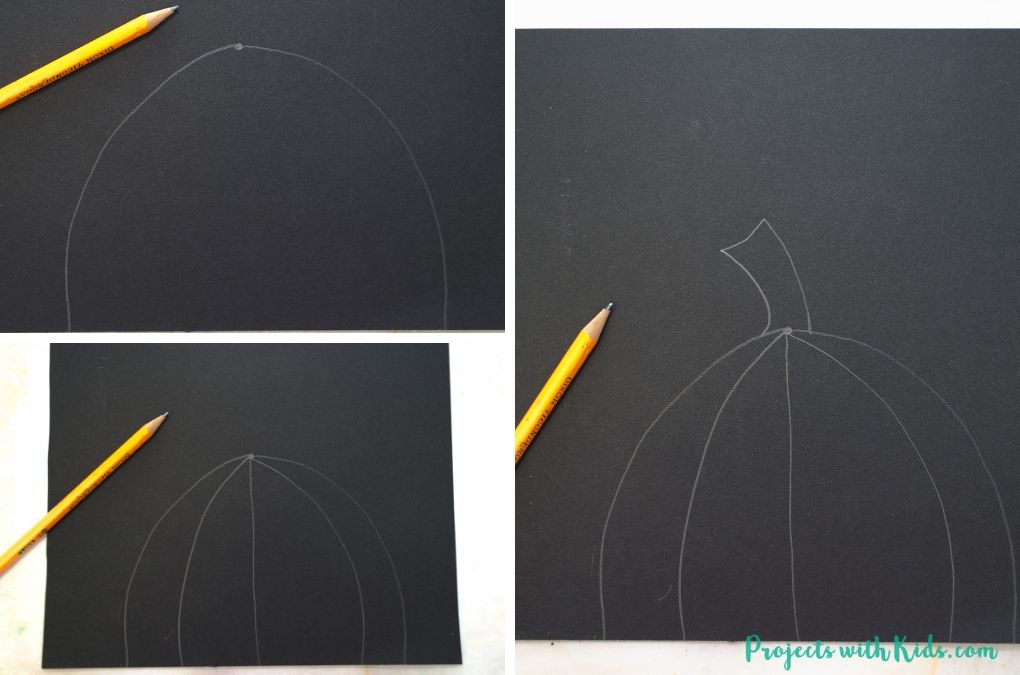
Beginning drawing in your pumpkin
2. It's really quite like shooting fish in a barrel for kids to draw a pumpkin! Start by drawing a simple dot where you want the meridian of your pumpkin to be.
If yous are doing the project with the full moon, your pumpkin will be lower on your paper. If you are coloring your sky blue, so your pumpkin tin can be bigger and take upwardly more than space.
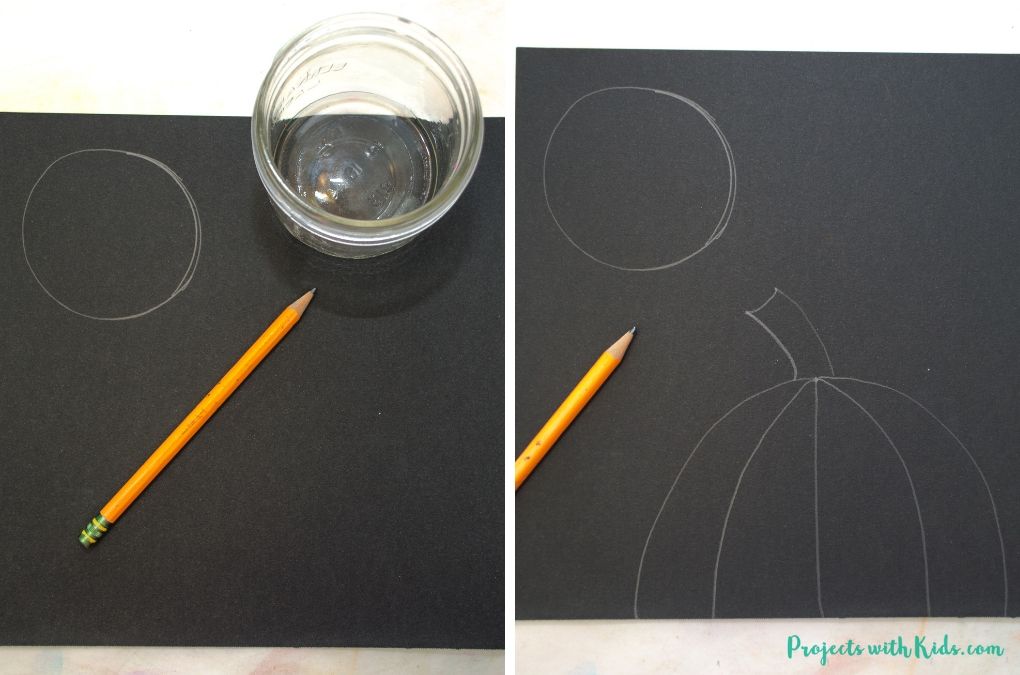
From your dot, describe lines to course your pumpkin similar in the case photos above. Add together on a stalk.
Using a jar or plastic chapeau as a template, draw in your full moon if you are including one.
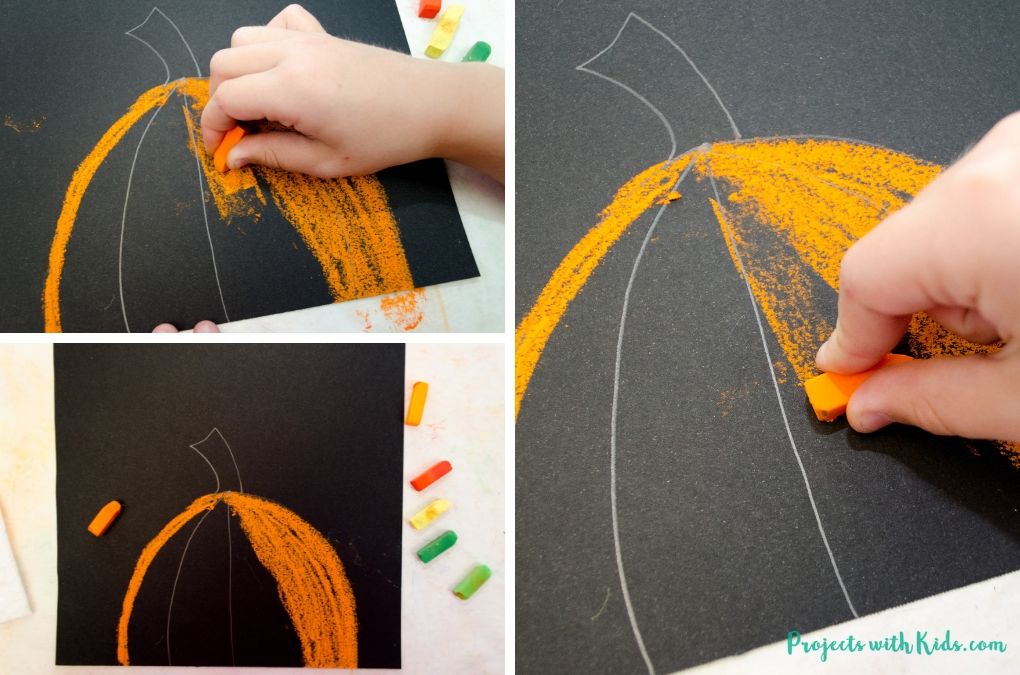
At present move on to coloring in your pumpkin
Having paper down and newspaper towels on hand will assist with the mess. Also taking a break in between steps to get and blow off the excess dust outside will help.
three. Commencement coloring in your pumpkin with orangish chalk pastel. Kids can use the flat edge of the pastel or hold it like a pencil and color information technology in. It'southward non necessary to make full in all the black, leaving some of the page showing through is fine.
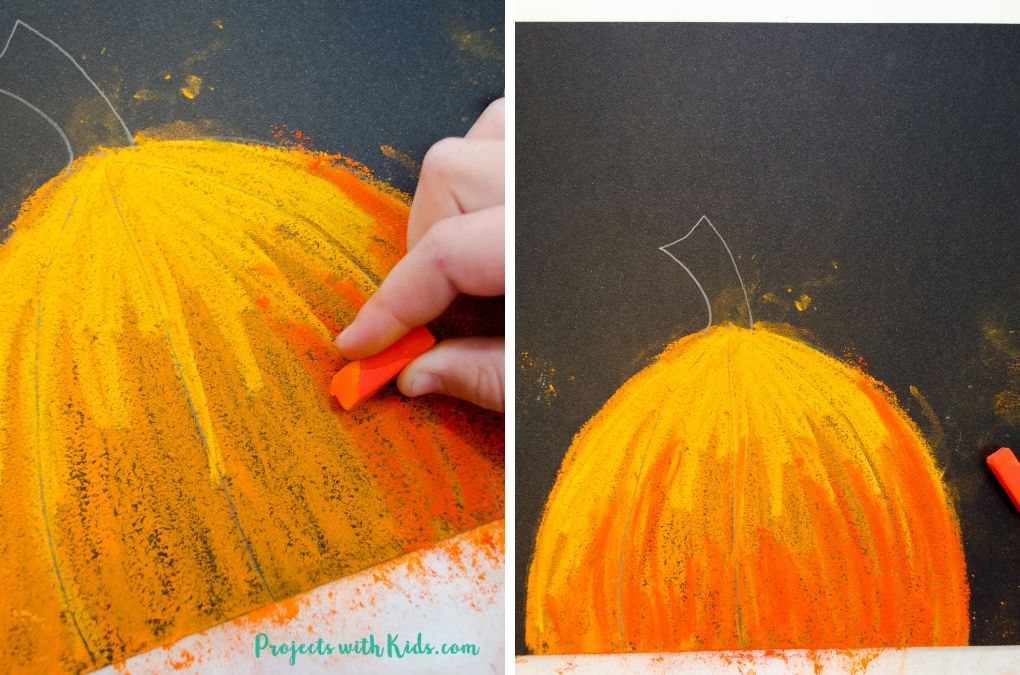
Once the pumpkin in colored in, kids can blend the pastel with their fingers. Use your first ii or your get-go finger for this. Remind kids not to blend the entire pumpkin, but but try smudging in a few places.
Some kids don't like to utilise their fingers with chalk pastels, so they can apply a blending stick or effort using a q-tip.
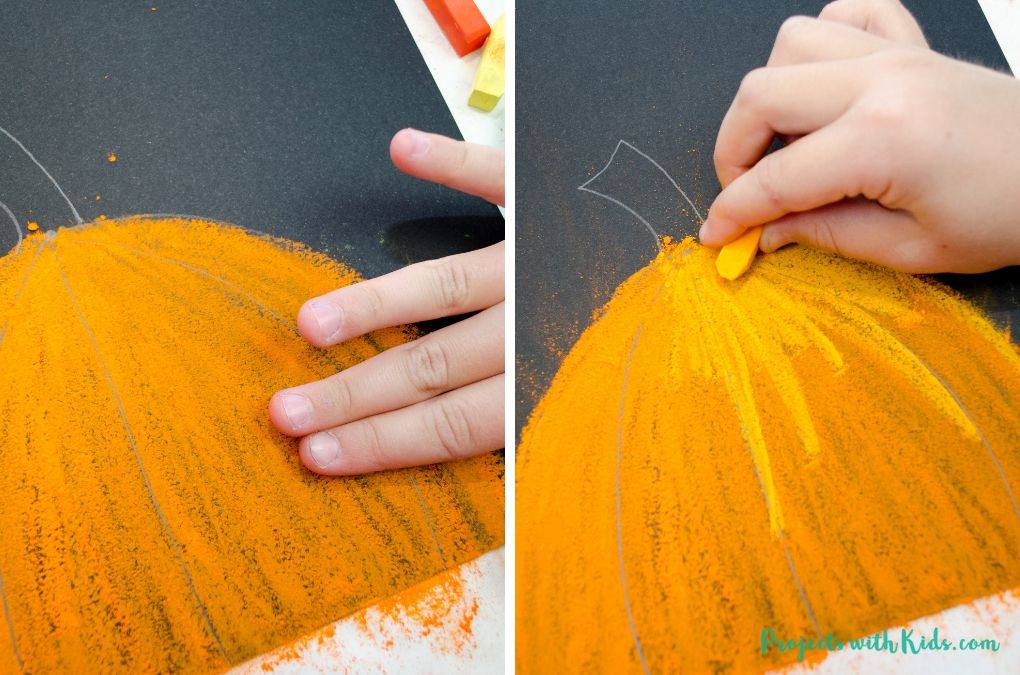
iv. Take a lighter shade of orangish and property your pastel like a pencil, describe in some lighter detail at the summit of your pumpkin.
Do the same at the bottom with a darker shade of orange, post-obit along with the photos higher up. Gently smudge the low-cal and night shades, blending them into each other.
Again, at that place is no need to blend the entire pumpkin, once kids accept a hazard to use and explore with chalk pastels, they will start to get the hang of blending!
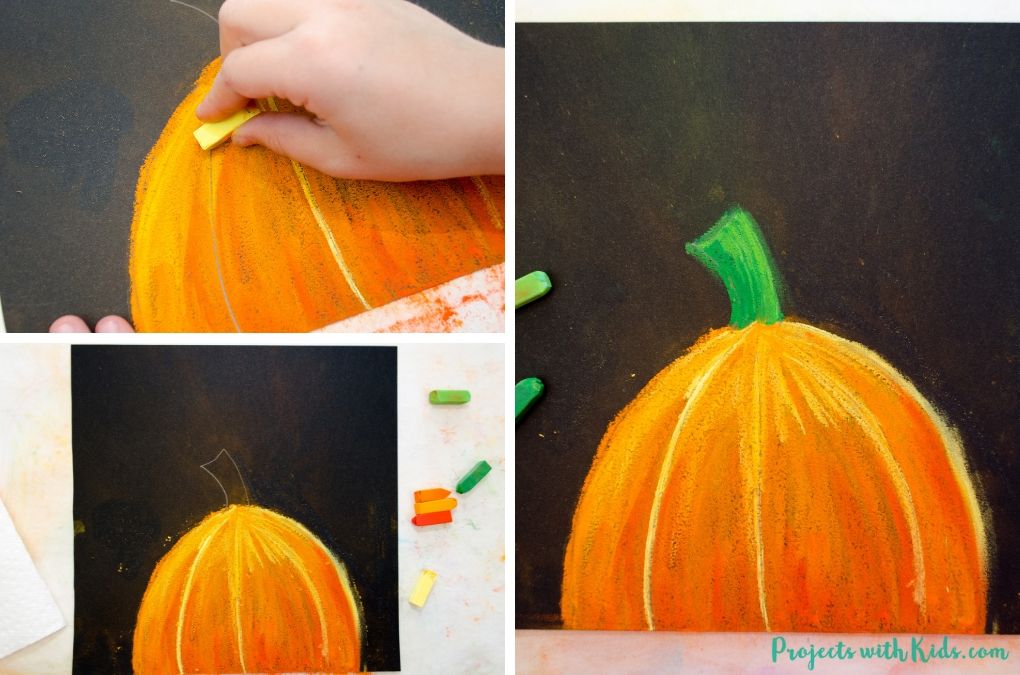
5. Finally, using yellowish chalk pastel, draw in some yellow highlights at the top of your pumpkin and lines to bear witness the grooves of the pumpkin.
Kids will also love: Colorful Chalk Pastel Turkey Craft
6. To cease off the pumpkin, color in the stem with 2 shades of green.
Color in your blue sky
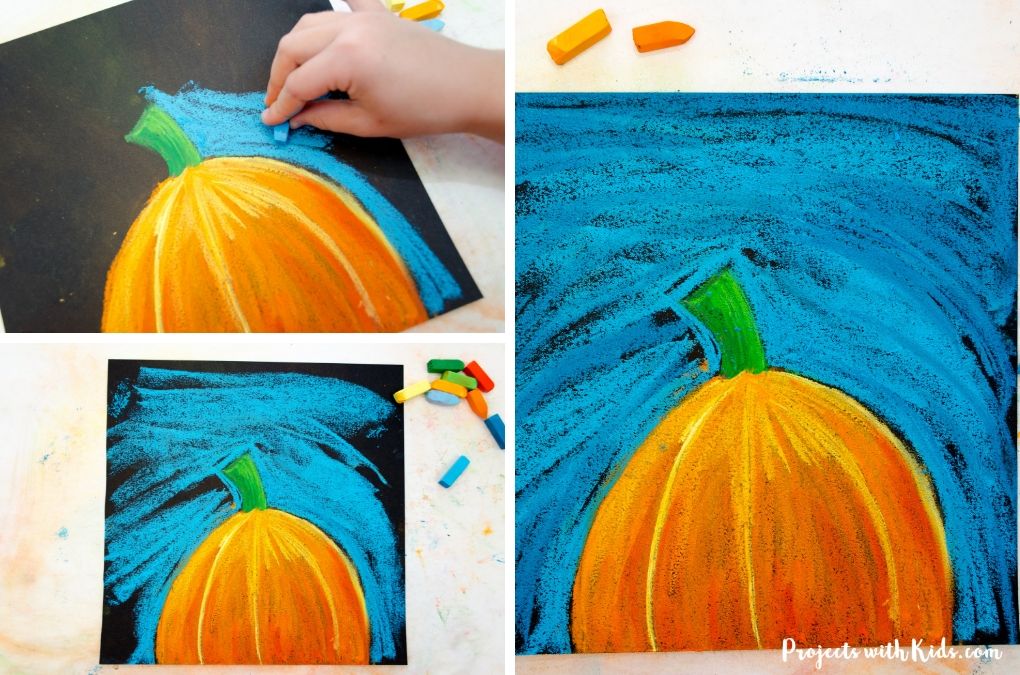
seven. There is a lot of sky to color in, and so using the apartment border of the chalk pastel works well for this footstep. Have kids kickoff with ane shade of bright blue and color in the background, drawing around their pumpkin, leaving lots of paper showing through.
Add in a second shade of blue and blend these two colors together, being actress careful around the pumpkin.
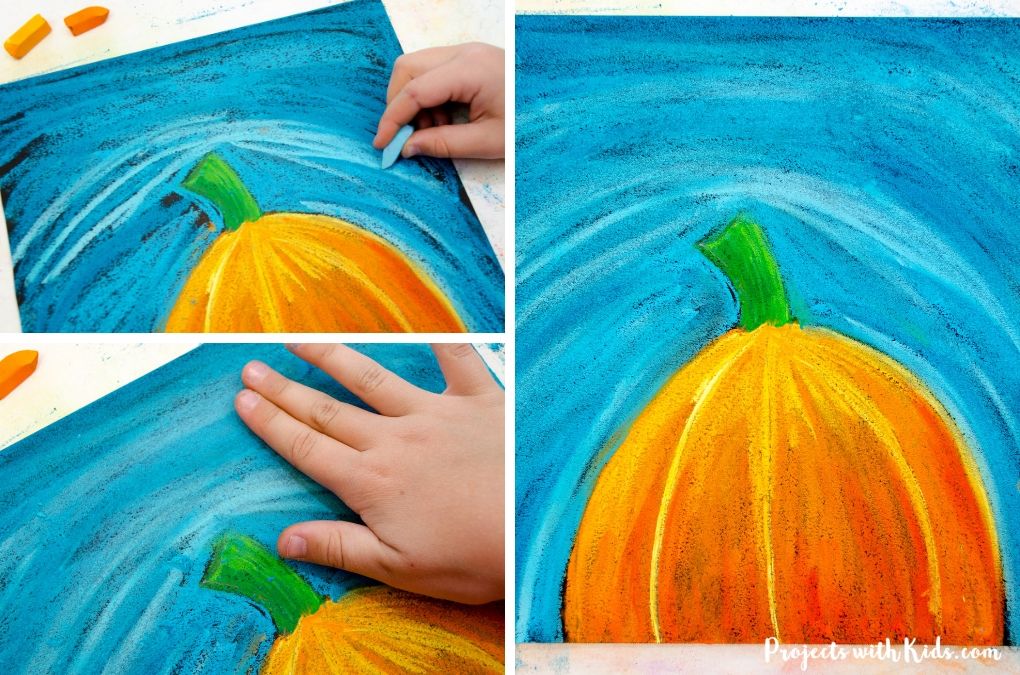
8. To finish off the sky, accept a lighter shade of blueish and holding the chalk pastel similar a pencil add together in some lines of this lighter shade. Accept kids attempt smudging this lighter shade in a few spots.
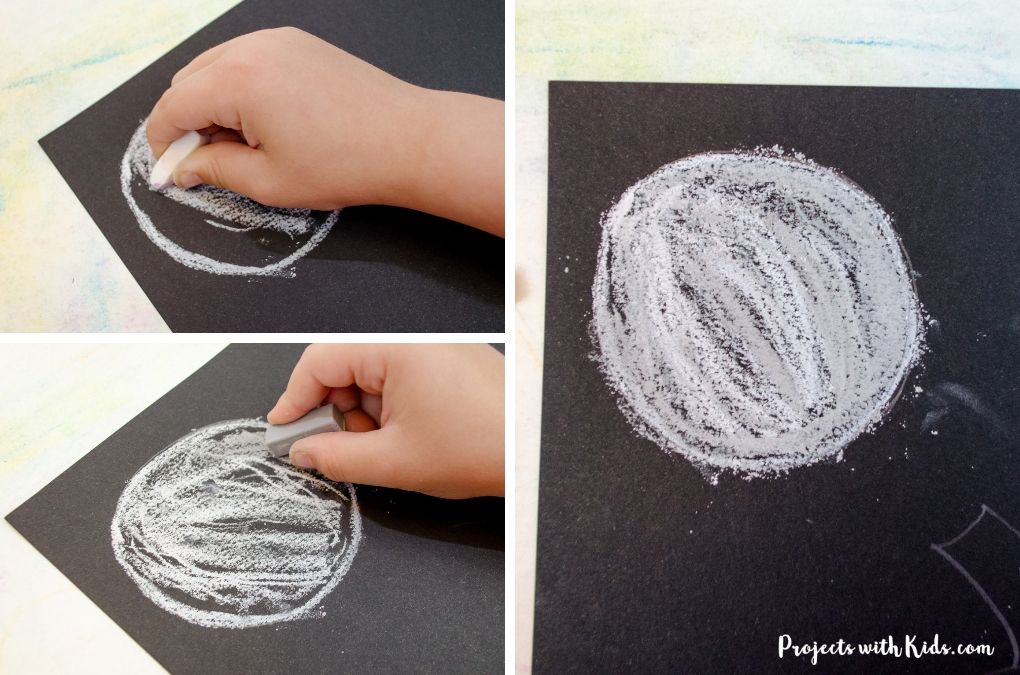
Draw in a full moon
9. If you lot are doing the pumpkin project with the full moon, get white, grey and yellowish chalk pastels set.
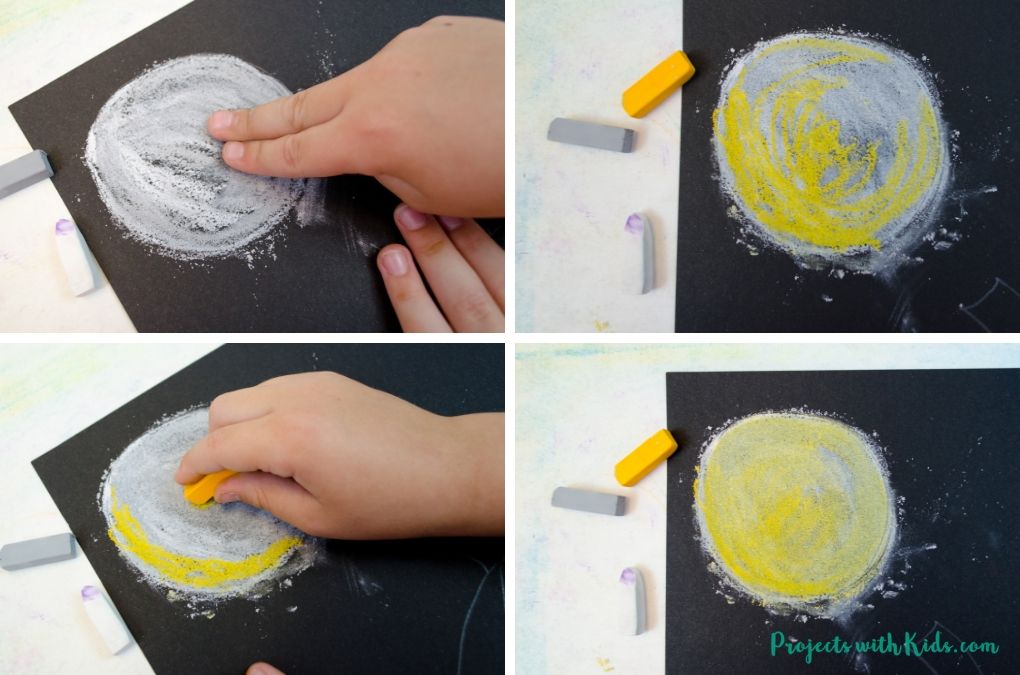
Commencement past coloring in the moon with white and grey colors, and alloy them together.
ten. Add some yellow to the moon and blend, similar in the photo above.
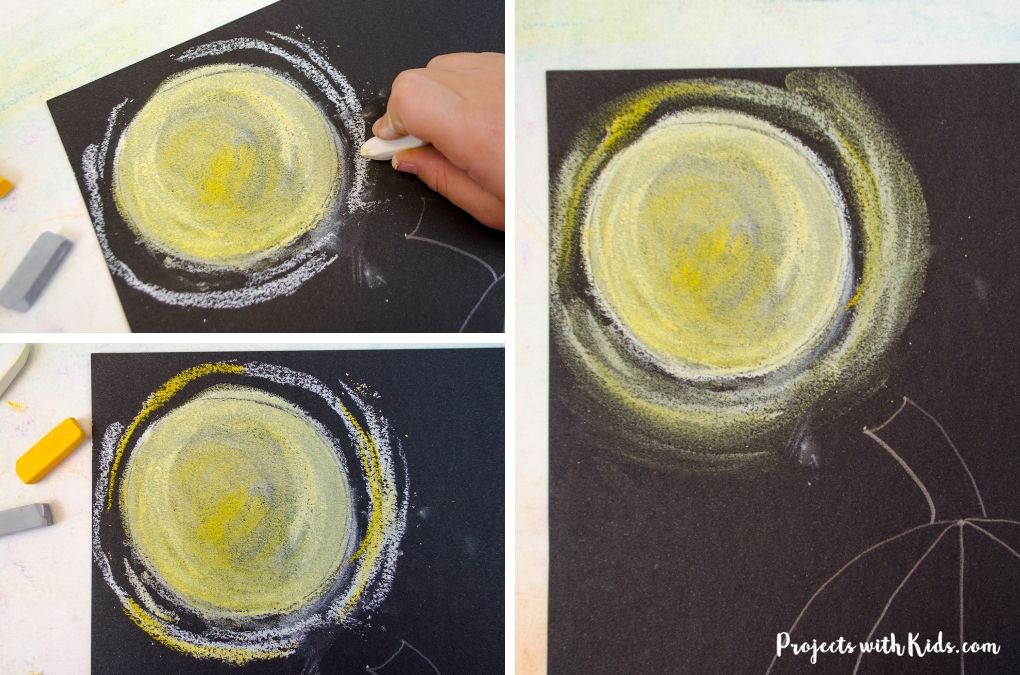
11. To terminate off the full moon, apply white and yellow chalk pastels to create a glowing outcome around the outside border. Carefully blend these 2 colors together.
You can spray your motion picture with a workable fixative if yous like to help keep it from smudging, but I find this isn't always necessary. This should be done by an adult only in an exterior area.
Add the vines to your pumpkin
12. I think the curly vines really finish off this pumpkin pastel art nicely! Hold a greenish pastel like a pencil and depict in the curly vines. Draw a line right next to it with a lighter shade of greenish to add in some highlights.
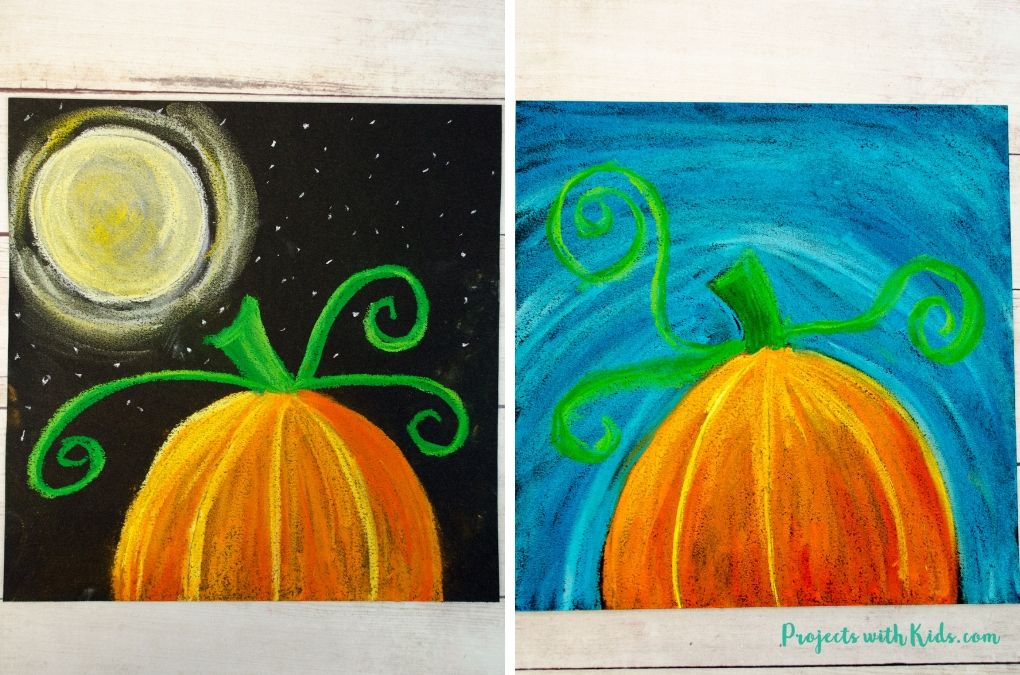
With the bright bluish sky, y'all tin can have the vines reaching up college. We also added in some white dots for stars at the terminate for the full moon art project simply this stride is optional.
This pumpkin chalk pastel art makes such a neat autumn or Halloween project for kids! Using piece of cake techniques, kids volition dearest exploring chalk pastels to create this gorgeous fine art project.
Nosotros dearest creating and exploring with unlike fine art supplies. If you are looking for more art projects to try, take a expect at our ultimate drove of amazing art projects for kids!
More chalk pastel fine art kids volition dear
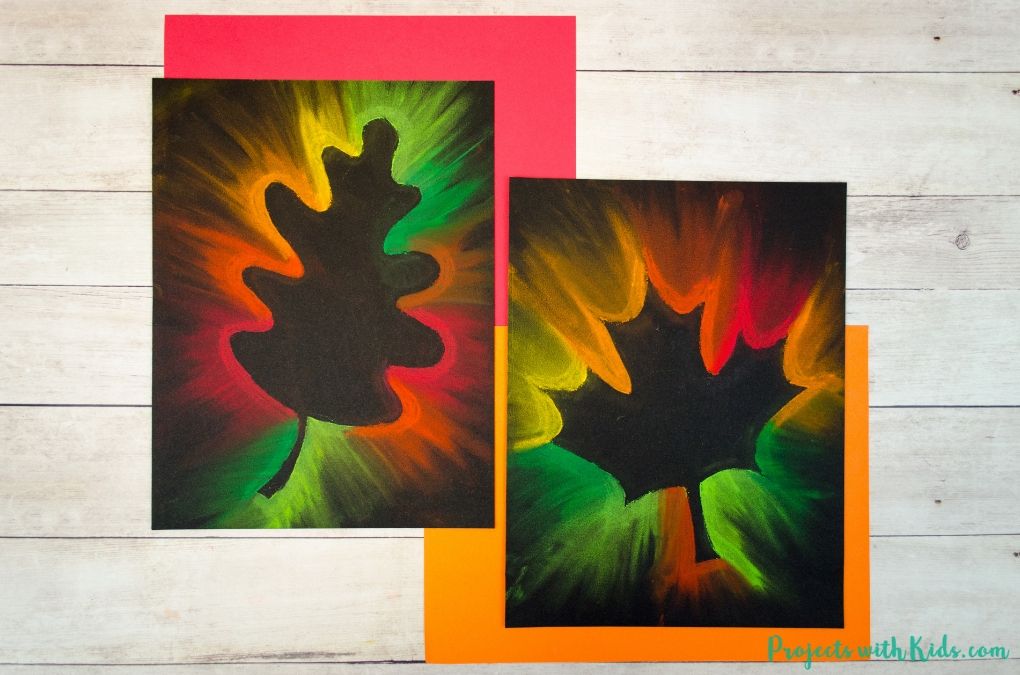
Gorgeous Fall Leaf Chalk Pastel Art Kids can Brand
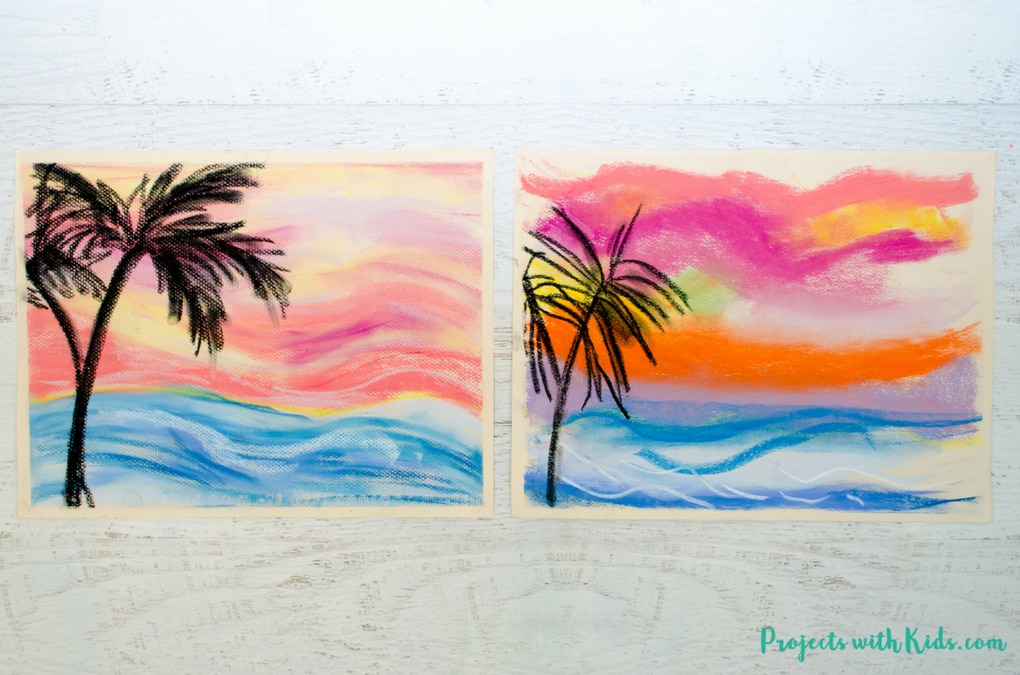
Create Stunning Chalk Pastel Sunsets with Kids
Follow me on Pinterest for more amazing project ideas.
Pin this art/craft for later
Prep Time v minutes
Active Fourth dimension 30 minutes
Total Time 35 minutes
Difficulty Medium
Materials
- Chalk pastels
- Blackness drawing paper, pastel paper, scrapbook newspaper or construction newspaper
- Q-tip or blending stick (optional)
- Paper towels
Instructions
- Get your black newspaper set, I trimmed ours to nine x 9 inches.
- Draw a pumpkin using the photo tutorials to a higher place.
- If yous are making the full moon projection, utilise a glass or plastic lid every bit a template to draw the full moon.
- Using orange chalk pastel, color in your pumpkin. Smudge the pastels with your fingers or use a q-tip or blending stick.
- Add a lighter shade of orange on the top of your pumpkin and a darker shade on the lesser, like in the photos above. Blend these colors together.
- Depict in some highlights at the tiptop and in the grooves of the pumpkin with xanthous chalk pastel.
- Color in the stem using 2 shades of dark-green.
- If you are doing the autumn pumpkin with a blueish heaven, colour the sky with ii shades of bluish and blend together. Using the flat border of the chalk pastel helps to add in some texture and make this stride go faster.
- Take light bluish chalk pastel and add in some lighter highlights to the sky.
- If you are drawing in the full moon, use white and grey chalk pastel to colour in your moon. Alloy these 2 colors together.
- Add some yellow chalk pastel to your full moon like in the photos above. Blending in some of the color.
- Create a glowing effect with the total moon by drawing white and yellowish lines around the moon, blending slightly.
- Draw in your vines with 2 shades of light-green pastel.
- If you want, utilize white chalk pastel and add together in some stars to finish off your Halloween pumpkin art.
- You can spray your picture with a workable fixative to aid keep it from smudging, but this is an optional step. This should be washed by an adult only in an outside area.
yirawalaspive2001.blogspot.com
Source: https://www.projectswithkids.com/pumpkin-chalk-pastel-art-project/
0 Response to "Pumpkin Art Project Using Oil Pastels for Third Grade"
Post a Comment